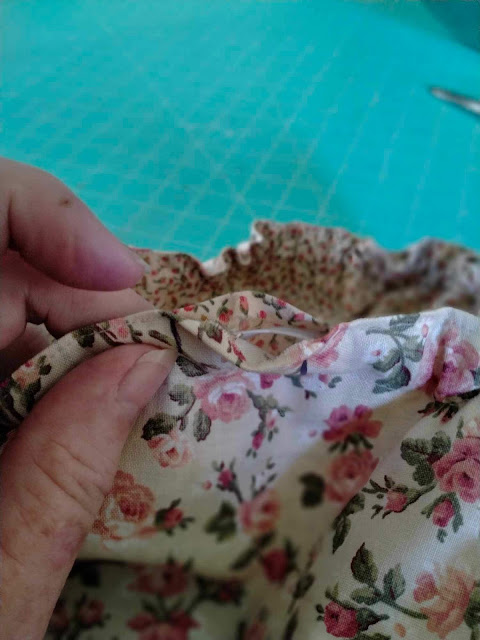
Back to basics. How to make bowl covers by Jane.
Jane's bowl covers are just beautiful and I have two sets! They are so useful and they also make really good gifts especially for anyone who is wanting to cut down on the use of plastic or who makes sour dough/bread etc. Because they are made of cotton they breathe which is just right for yeast. Sorry about the all over the place numbers in this post, I could not figure out how to remove them. 😊
I am very grateful to you Jane for your help.xxx
How to make Bowl Covers
I made my first set of bowl covers about 15 years ago. We lived in the tropics and often found ourselves cut off by massive storms, flash flooding and the odd cyclone. One time we ran out of plastic wrap and we needed something to cover the food. I had already used up the beeswax wraps. Necessity led to my first covers being made.
These first covers have been replaced and modified over time.
If you can trace a circle, know how to measure a little, can cut out better than a 5yr old and can sew a straight line, then these will be an easy make for you.
These are not waterproof or spill proof like plastic wrap. The seal is also not air tight. They do not replace plastic wrap when you need spill proof or a good seal. They are however a great cover for everything else.
Some of the uses for me
Salad bowls. I have made covers out of dance mesh in the past. You can have the salad on the table, people can see what is in the bowl, and the flies are kept out. No more Aussie wave at the table.
Some of the uses here.
Cut up watermelon. The Littles can reach in grab a piece and go. The cover snaps back into place.
Proofing bread/sourdough
Sourdough starter
Ginger bug
Sauerkraut
Chokos, zuchinni, cucumbers sitting in salt to draw out moisture before processing
Cut up fruits for processing
What other uses do you have for these versatile, easily washed and reused bowl covers?
How To Make Bowl Covers.
Collect a bowl that you use regularly.
Enough fabric for two circles, 5cm/2” wider than each bowl
Tape measure
Pencil
Scissors
Elastic- I’ve used 6mm/1/4” elastic
Thread of your choice and a sewing machine. We are only using straight stitch on these bowl covers.
The first step is optional but I highly recommend it. Iron your fabric. Flat fabric is easier to work with for tracing, cutting and sewing.
- Lay your two fabrics, right side together on your cutting surface.
- Place the bowl upside down on the fabric.
- Trace around the bowl. Remember to leave at least 5cm/2” of fabric around the bowl
- Remove the bowl.
- Mark 5cm/2” at intervals around the traced circle
- Join the marked intervals together. You now have an inner and an outer circle.
- Pin around the inner circle to hold both pieces together
- Cut along the outer circle line.
- Pin around the outer edge as this will be you first sewing line. Make sure you leave yourself about a 10cm/4” gap for turning. I like to mark the fabric to remind me to stop and leave a gap.
- Sew around the circle with a 6mm/1/4” seam. Remember to leave your gap for turning
- Remove all the pins. Turn the fabric right way out. Press flat. Make sure you fold the turning area under and press both sides together to get and lovely finish.
- We are now going to top stitch as close to the outer edge as we can of the cover. We are going to leave a gap for threading elastic. I mark the fabric to remind myself to leave the gap. Sew your top stitching. Hint- slow your machine down if this helps with your accuracy.
- We are now going to sew the elastic casing. For those of you who are confident with using the guides on your machine, you are going to sew a full inner circle 2cm/6/8’ from the outside edge of your circle. For those of you who are unsure of what this means, use your tape and pencil and mark off 2cm/6/8” intervals round your fabric. Join the intervals up and sew this as a complete circle.
- We are now ready for the elastic. My elastic is on a long roll. I just put a safety pin in and thread it through the casing. This is why we left the gap in the outside edge when we top stitched. Pull the elastic through the casing and then pull it till you have enough gathering and tension on the elastic to slip over the bowl, and to have a good grip.
- To join the elastic you can either sew it together or tie a knot. It is up to you. I like to lay the elastic on top of each other and then use forward and reverse with a zig zag stitch. Knots work just fine.
- Top stitch closed the little opening on the outside circle that we used to thread the elastic through.
Congratulations you have now made your first bowl cover. I can assure you that once you get used to using bowl covers you will want to make more. These are a great time saver, and they are a great cost saver, keeping your plastic wrap usage to a minimum.
PS I have also used this pattern to make shower caps. I used a shower curtain I got from the op shop as the fabric. It worked a treat.
Enjoy your bowl making.
Love Jane.
Thank you so much Jane. I love having them reversible, they look so pretty. Also they do not take up a lot of fabric so remnants can be used. xxx


Annabel and Dear Ladies, Prayers are with ALL.
ReplyDeleteAnnabel thank you for having Jane do a post. Jane thank you for your post, it is wonderful and the instructions are amazing, you make it all sound so easy. Thank you for your work.
Jane, would also love if you did a post on how you made the quilted afghan in the background it is so lovely.
I had a slow week, every day had something though. I did have the time though to make peach jam, maple pumpkin butter from cans I had in pantry. I also put together a gift basket for old friends of ours. I had to laugh because husband had put safety stickers all around boxes of hot sauce he was going to give a few men. So we have a grocery bag full of gifts and all came from my pantry.
We have bitterly cold weather here lately, -12*C and add in 80.4 kph winds added in. Needless to say we stayed in as much as possible. I was blessed with finding folders at a thrift store so I spent time organizing print outs, recipes, instructions, you name it. I know today's world is going digital but if we lose power forget grabbing your laptop or tablet.
Annabel, thank you for all you do. May the Lord watch over you and comfort you.
Rosanne making bowl covers is as easy as it sounds. The afghan is a bit more difficult but I will think about putting a 'How to', together for it.
DeleteThank you, Jane. I have wanted to make bowl covers for a long time, but had no pattern to follow. This is perfect.
ReplyDeleteGlenda by using your own bowls for making the bowl covers, you know they are custom made for your kitchen.
DeleteThank you for this post Annabel and Jane. I love the fabric you chose.
ReplyDeleteAs soon as I saw this fabric I knew it had to be made into something for Annabel.
DeleteThank you so much, Jane! What a great gift. I have many friends I can give these to. Especially those that make kombucha and sour dough breads.
ReplyDeleteBlessings,
Leslie in Ohio
Leslie I use mine for all those purposes. The bowl covers are just wonderful to have.
DeleteThank you Jane and Annabel! This is a great tutorial. I was given some fabric covers about a year ago and we use them all the time. They are just one layer of fabric, I like how you make them reversible. I’m giving these a go!
ReplyDeleteIt’s lovely if you to help Annabel out with some blog posts Jane, thank you.
Jen (NZ)
Jen I have found that my sourdough starter or my kombucha, used to develop a funky mould with a single layer bowl cover. I have never had that issue with the double layer. Having a double layer means the covers are completely reversible as well.
DeleteThank you so much Jane and Annabel! I am going to try this tomorrow afternoon since I have a bit of sewing to do then. I especially like the idea of making the next ones to keep flies out but still be able to see the contents of the bowl. Very clever and good instructions!
ReplyDeleteI made some new net covers this week. No flies in my food.
DeleteThank you Jane, this is a very helpful video - I have not made these before and the covers would certainly cut down on the use of plastic wrap. Best wishes Lyn
ReplyDeleteI need to make some more netting covers and mine have ended up at my daughters home. They really do help keep the flies out of your food.
DeleteThank you so much Jane and Annabel! I just received a sourdough starter from a friend and made a few covers for the jars! How wonderful that you shared the pattern when I was wondering how to cover a bigger bowl! Many prayers for you and your family, Annabel.
ReplyDeleteHugs,
Stacy in Virginia
Stacy using your own bowls for the pattern means they are a custom make for your kitchen. You cant get better than that.
DeleteThank you Anabelle and Jane. I think this would also be great over tea or water pitchers at outside events. Cant wait to make one now.
ReplyDeleteMy son has taken the smallest one of ours. He uses it to cover his beer. He doesnt mind that the cover is a floral fabric. He has asked if I can make a few in boy fabrics to give to some of his mates.
DeleteThank you, Jane, Thank you, Anabell. Such a great and easy to follow, detailed pattern. Great gifts, very practical and beautiful. (My next weeks*s project, I trhink)
ReplyDeleteFor something funny - a real story: when I was a kid we hah a neighbour boy who had his hair cut with the help of a round bowl. Literally, his mother put a bowl on his head and cut off what hair remained outside.
Sending lots of love from far away, Laura_s_world from Romania
Laura I am glad that you have found the instructions easy to follow. I am looking forward to seeing the bowl covers that you make.
DeleteThank you Jane, this is a great tutorial. I’m encouraged to make some bowl covers and a great way to save on plastic wrap.
ReplyDeleteBlessings Gail.
Gail these bowl covers are really simple to make. I hope you have a go at making some. You will be so glad that your did.
DeleteI've wondered how that was done Miss Jane. Thank you both for sharing this project with us.
DeleteLaura of Harvest Lane Cottage
Laura they are so simple to make. Have fun.
DeleteThank Annabel & Jane
ReplyDeleteThis is a fantastic post an I want to say "thanks Jane" for sharing how to make these covers an teaching me something new
Take care
Aly xxx
Aly you are most welcome. I hope you have a successful bowl cover making session.
Delete